
Water-activated face paint behaves differently by product, color, tool, room conditions, and technique. Make small adjustments, test on an appropriate practice surface, and follow the manufacturer's directions rather than treating one texture as universal.
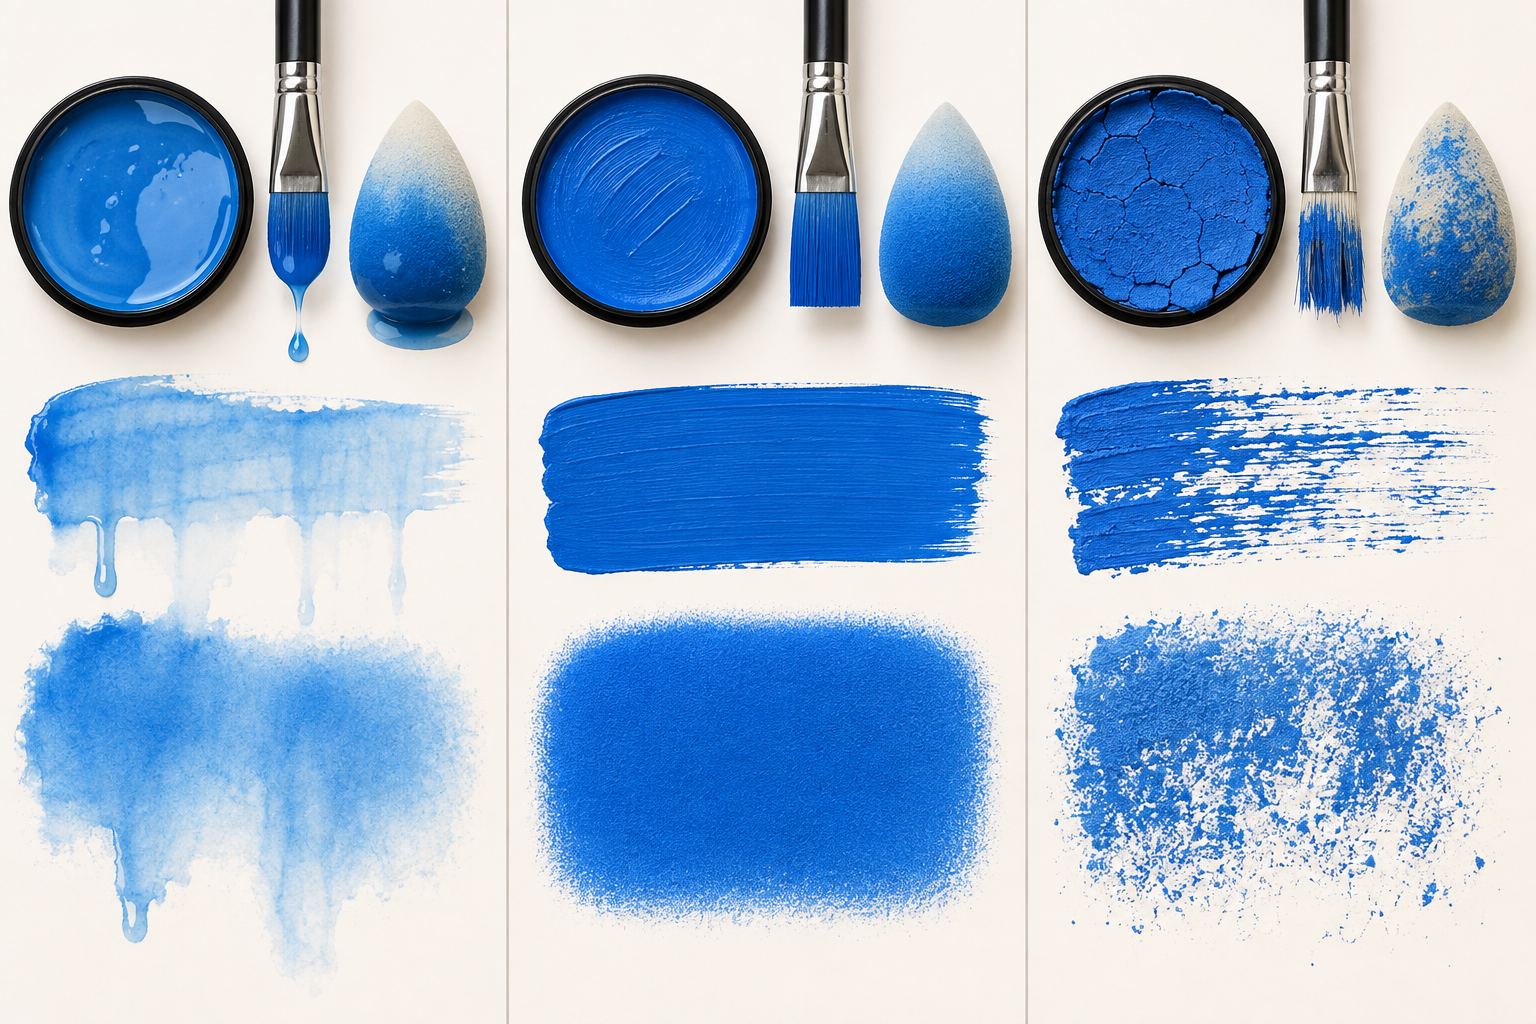
Signs the paint is too wet
- Color looks translucent after repeated passes.
- Lines spread, bead, or bleed into nearby color.
- A sponge leaves shiny puddles or soft uncontrolled edges.
- Paint runs down the palette or skin.
Remove excess moisture from the tool, work the paint briefly to rebuild pigment, and test again. Avoid correcting wet paint with many immediate layers, which can lift or muddy the surface.
Signs the paint is too dry
- The brush drags and skips instead of releasing a continuous line.
- A sponge produces speckles, patchy gaps, or crumbs.
- The surface looks thick or cracked rather than flexible and even.
Add only a small amount of water in the manner permitted by the product instructions, work it into the paint, and reload the tool. It is easier to add another small amount than to remove a flood.
Brush and sponge consistency are not identical
Fine linework often needs a fluid, well-loaded brush that still holds an edge. Sponge work usually needs controlled moisture so the sponge releases opaque color without dripping. A stencil generally requires an even drier sponge load to prevent paint traveling under the stencil.
Check other causes before adding water
Uneven results can also come from an overloaded or nearly empty tool, residue, damaged bristles, an unsuitable sponge, mixing incompatible products, painting over a wet layer, or working in heat and airflow that change drying speed.
Use a repeatable test
- Start with the product instructions.
- Activate a small area rather than flooding the full cake.
- Load the tool evenly.
- Make one line, pressure stroke, and fill sample.
- Adjust one variable and test again.
For tool selection, compare brush shapes and their marks. For foundational design practice, use the beginner face-paint ideas.