You've been asked to do face painting at the school fair. Or maybe you just want to add some magic to your child's birthday party at home. The problem? You've never held a face paint brush in your life. That's completely fine. You don't need artistic talent to make kids feel magical. You need the right designs.
Every design in this guide was chosen because it looks impressive but requires no special skill. Each one relies on simple shapes, bright colors, and a single technique you can learn in minutes. We paint these designs at real events across North Carolina every weekend — and they never fail to draw a crowd.
Total cost to get started: under $30. Time to learn the basics: one practice session. Time to paint each design on a child: 3 to 8 minutes.
✨ Perfect For
At a Glance: Which Design Is Right for You?
Not sure where to start? Use this table to pick the best design for your situation before reading the full breakdowns below.
| Design | Difficulty | Time | Best For | Guide |
|---|---|---|---|---|
| 🌈 Rainbow | ★☆☆ Easy | 3–5 min | Any event, any age | View Guide → |
| 🍩 Donut Eye | ★☆☆ Easy | 5–7 min | Birthday parties, food themes | View Guide → |
| ⚽ Soccer Ball | ★☆☆ Easy | 5–8 min | Sports events, boys' parties | View Guide → |
| 🐱 Black Cat | ★★☆ Moderate | 4–6 min | Halloween, animal themes | View Guide → |
| 🍦 Melting Popsicle | ★☆☆ Easy | 5–8 min | Summer parties, pool events | View Guide → |
1. The Rainbow — The Beginner's Best Friend
The rainbow is the most-requested design at every event we attend. It works for girls, boys, toddlers, and even teenagers who want something quick and cheerful. More importantly, it's the most forgiving design to paint: if the arc isn't perfectly symmetrical, nobody notices — because the colors are so vibrant that the eye focuses on the whole rather than the detail.
Why kids love it
It's instantly recognizable, joyful, and bright. Children who are hesitant to get a face design almost always say yes to a rainbow.
Beginner tip
Use a split cake — a single compact with multiple color stripes. Load a flat brush across all the colors and sweep it in a single arc. You get 6 colors in one stroke. No blending, no skill required. A good split cake will be the best $8 you spend on your starter kit.
Common mistake
Using too much water. If the paint is too thin, the colors bleed into each other and turn muddy brown. The paint should feel like soft butter — spreadable but not runny.
2. The Donut Eye — Food-Themed Fun That Goes Viral
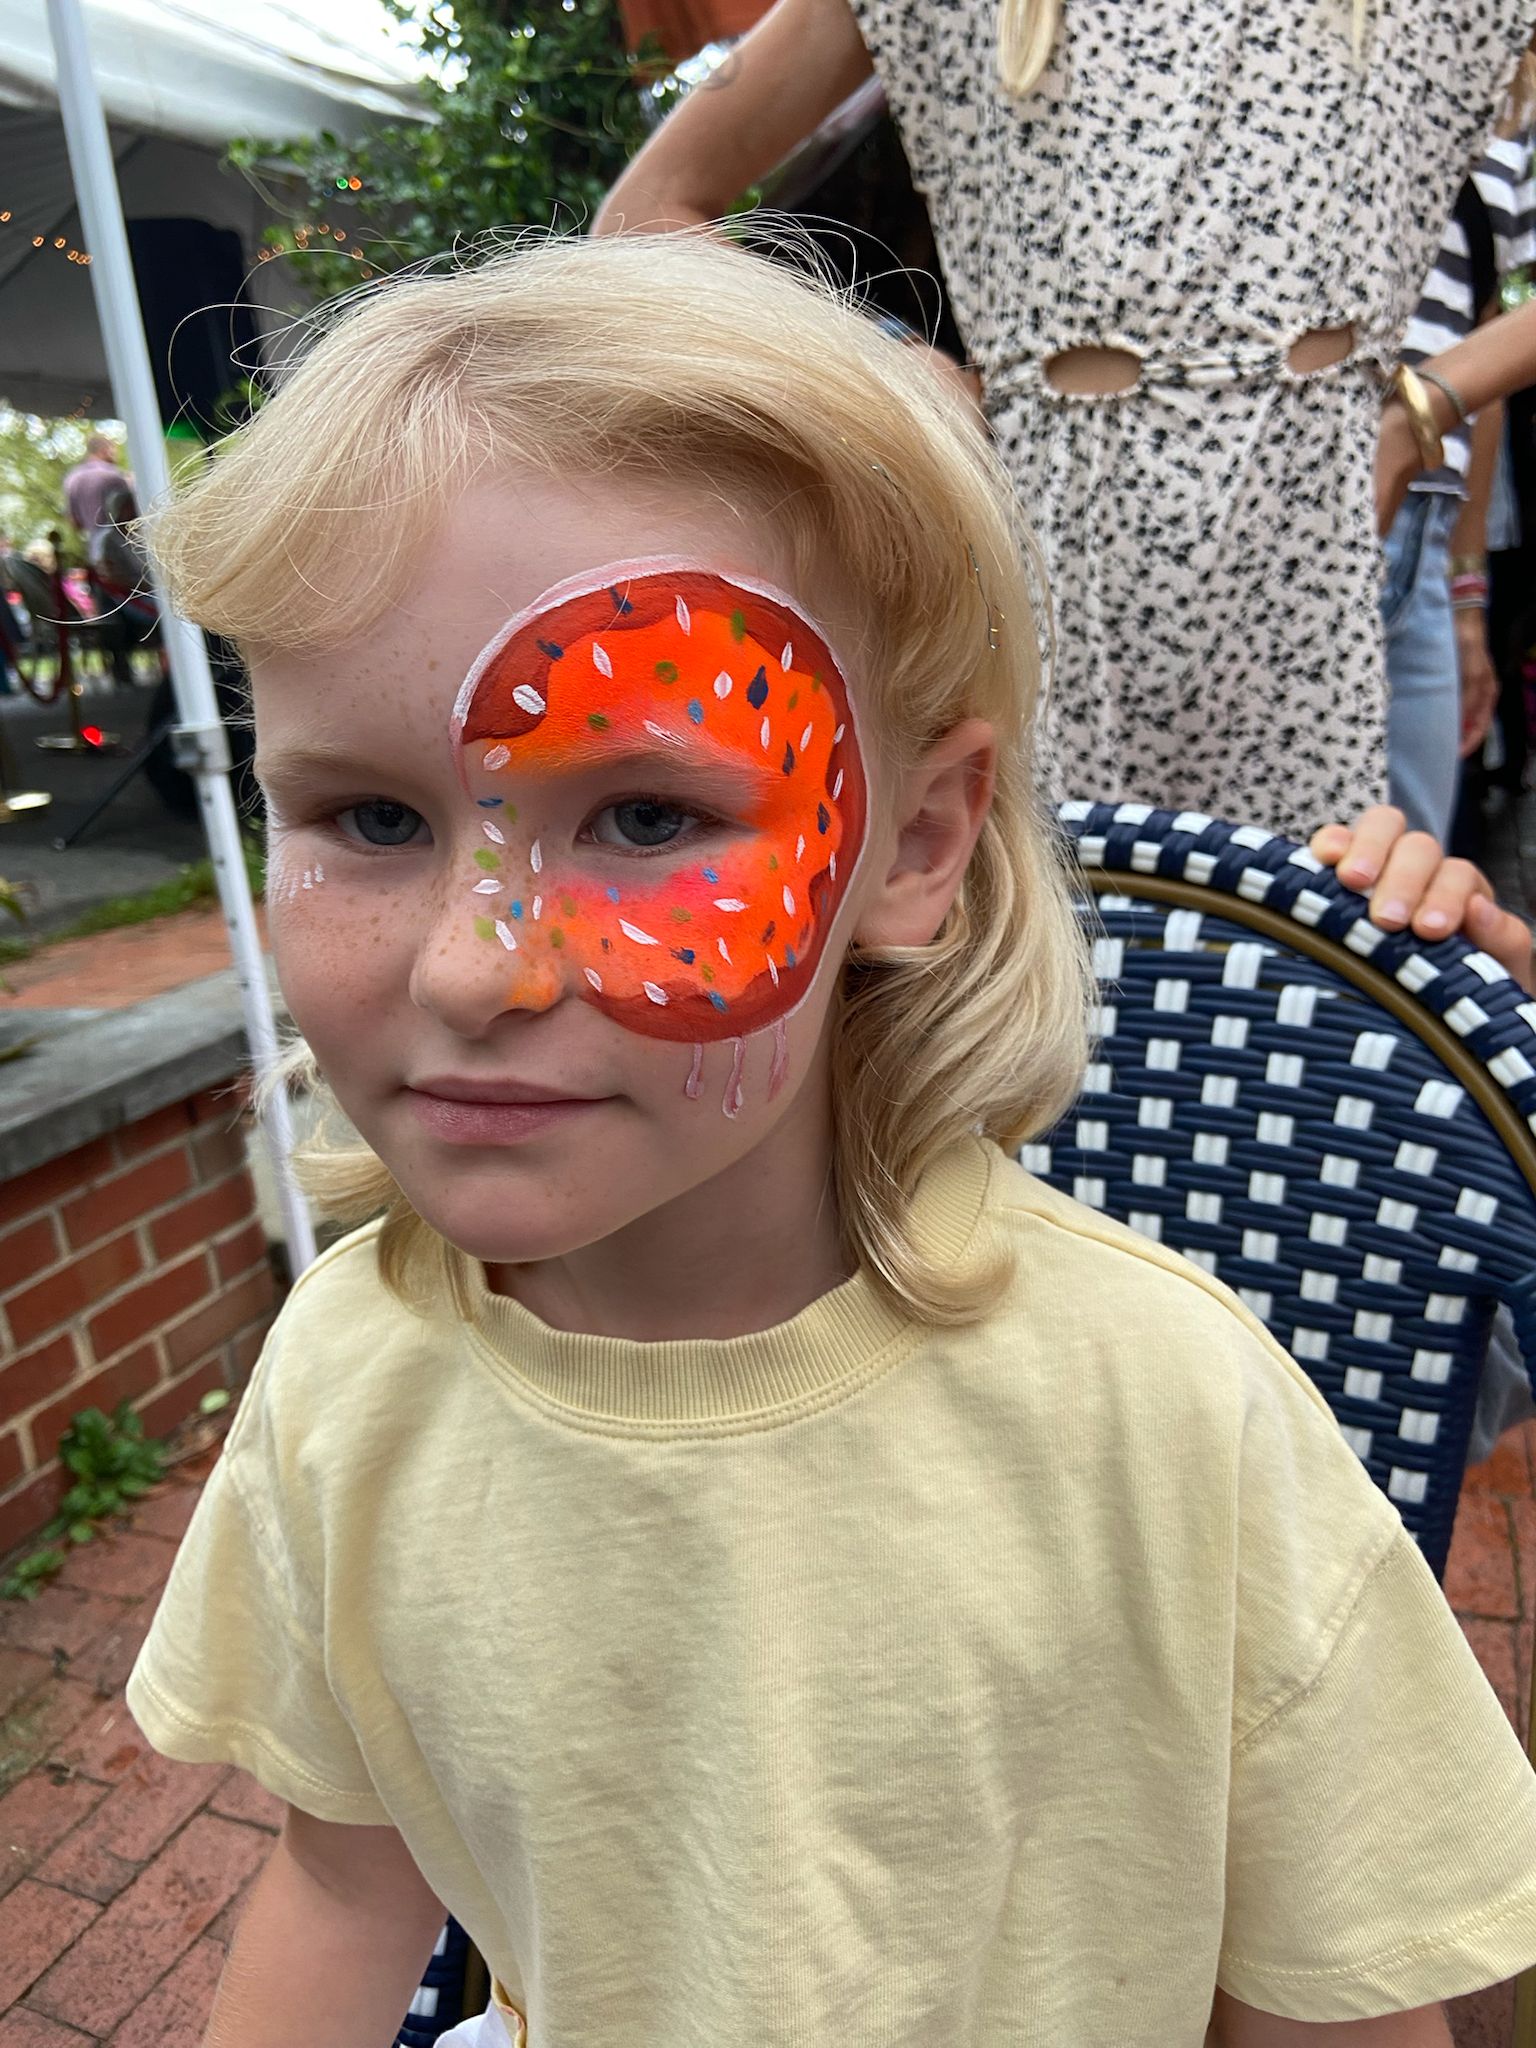
Food-themed face painting is one of the fastest-growing trends in the industry, and the donut is the undisputed star of the genre. This design is painted around one eye — the hole of the donut is perfectly centered on the eye socket, so when the child opens their eye, it peeks through the hole like a real frosted ring. The reaction is always the same: immediate laughter and delight.
Why kids love it
It's surprising and funny. Older children especially love showing it off because it photographs brilliantly — the donut eye is one of the most-shared designs on parents' social media.
Beginner tip
Ask the child to keep their eye gently closed during the sponging phase. The donut ring goes around the eye socket, and the eye socket itself is the guide for where the hole should be. Once the ring is sponged in, the eye naturally falls in the center hole.
Common mistake
Making the ring too small. A donut that barely frames the eye looks cramped. Make the ring generously wide — at least an inch on all sides of the eye socket. Bigger is better here.
3. The Soccer Ball — The Boy-Friendly Go-To
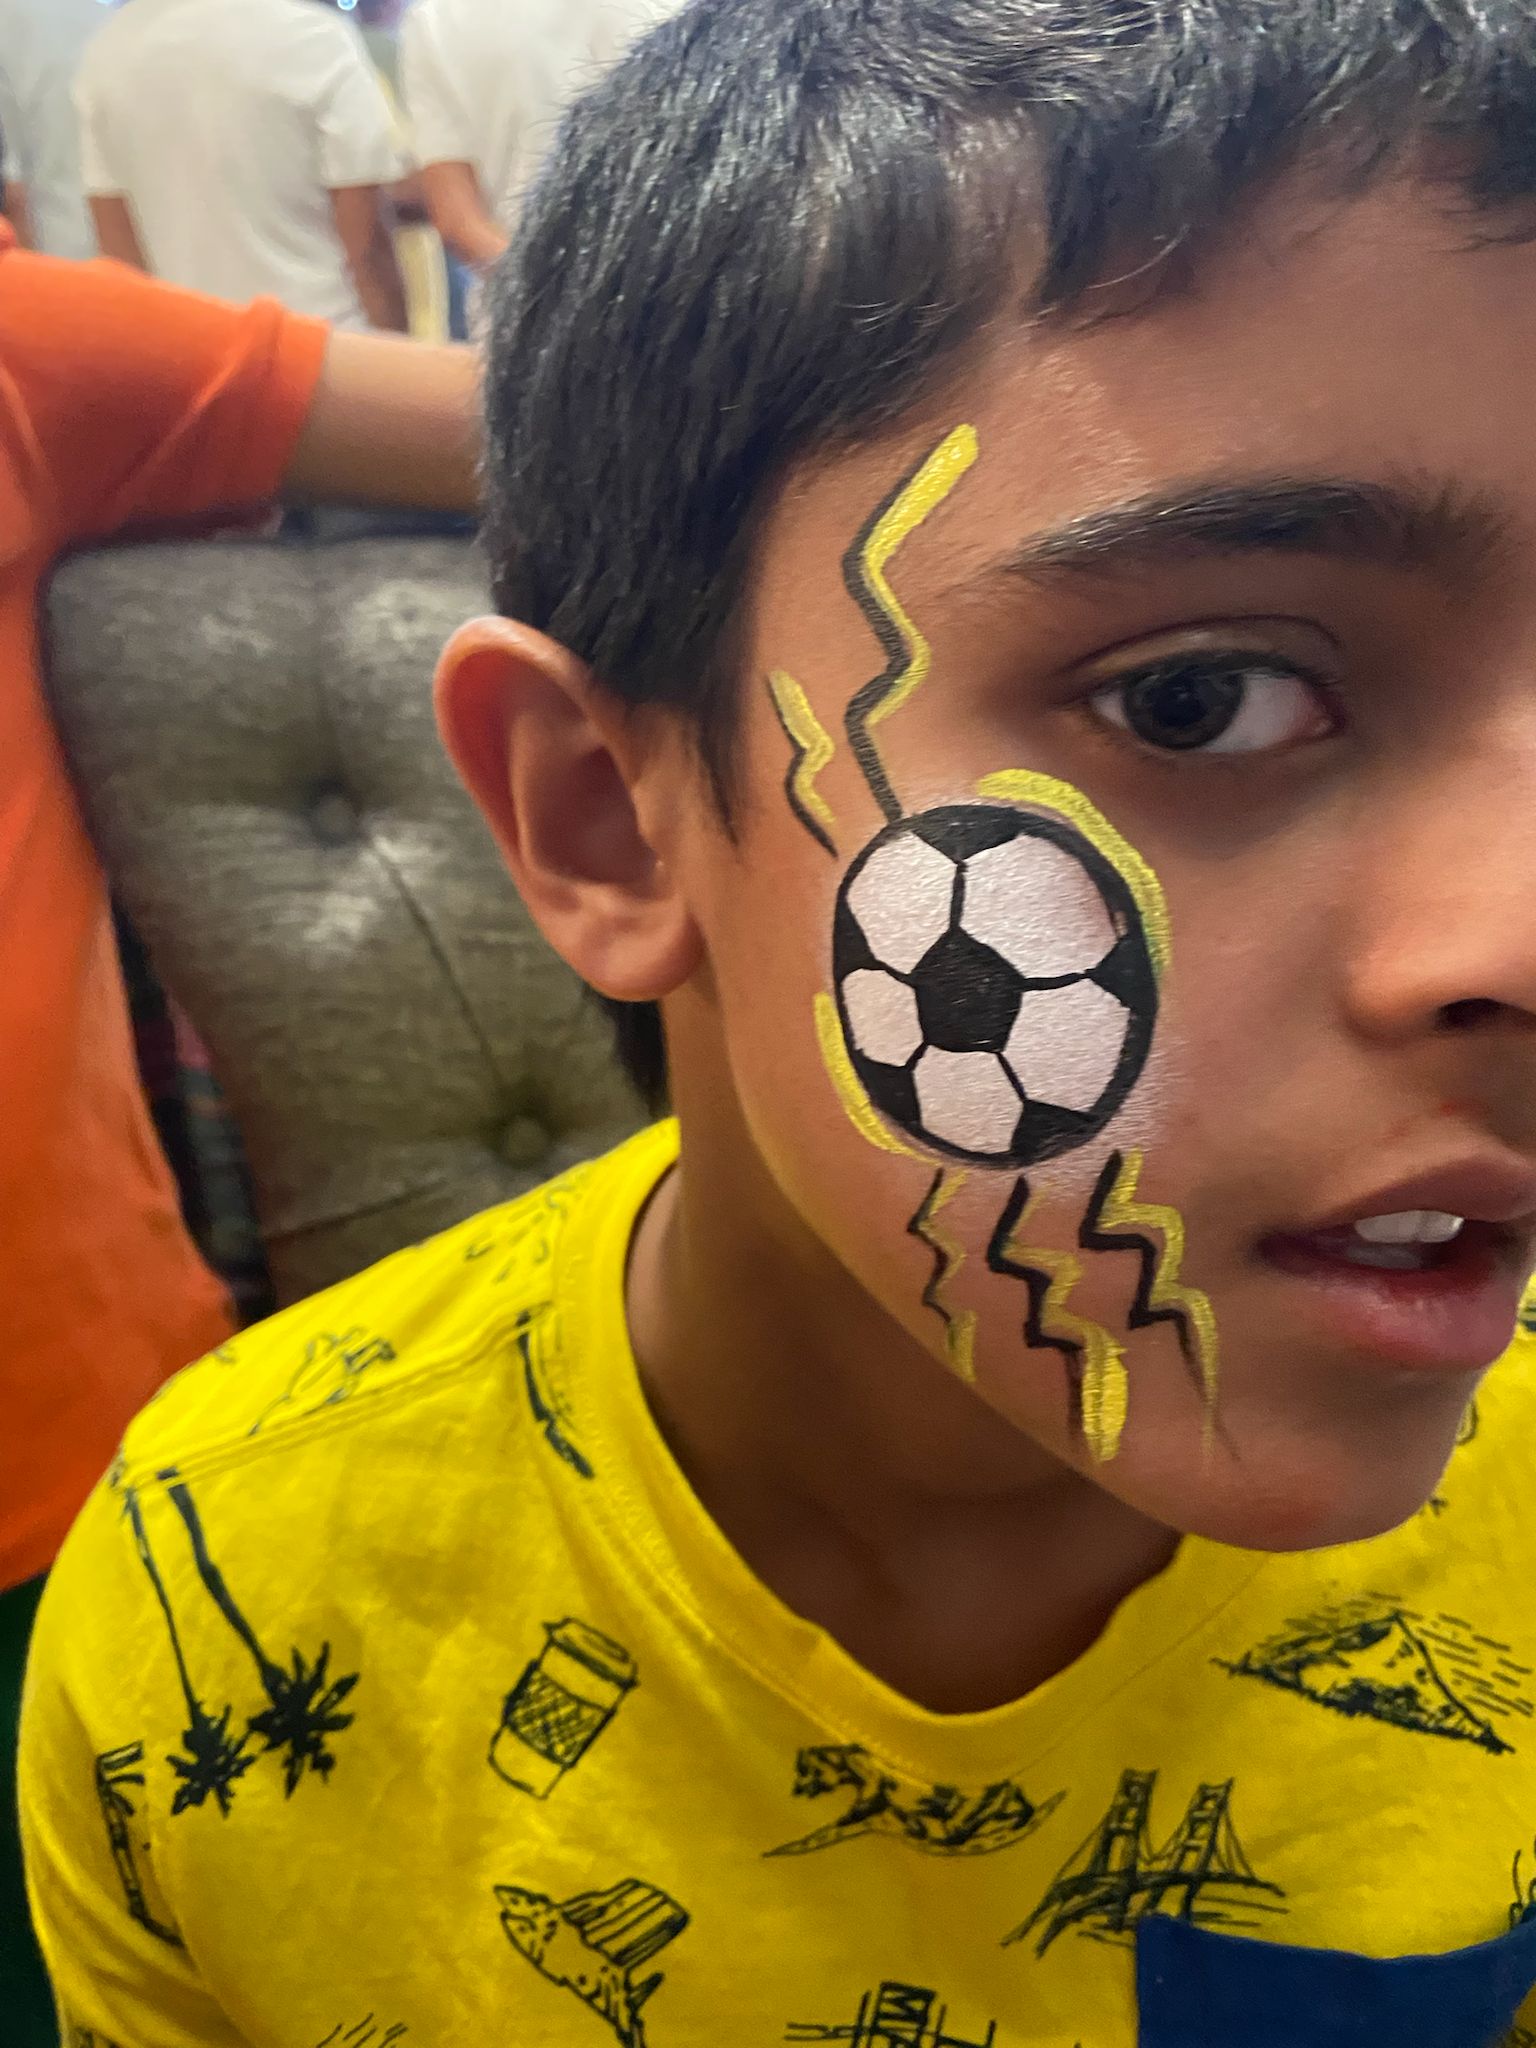
If you're painting at an event with equal numbers of boys and girls, you need a reliable design for children who aren't interested in butterflies, flowers, or unicorns. The soccer ball is that design. It's clean, geometric, and instantly recognizable. We pair it with a gold lightning bolt on the other cheek to add energy and personality.
Why kids love it
Young athletes feel like champions wearing this. At soccer tournaments and school sports days, this design creates an instant connection between the child's identity and the art on their face.
Beginner tip
The trick is the pentagon pattern. Paint a white circle first and let it set for 30 seconds. Then add one central pentagon in black, and 4–5 partial pentagons touching the edge of the circle. You don't need perfect geometry — the eye fills in the gaps.
Common mistake
Skipping the outline. A soccer ball with no black outline around the outer edge looks unfinished. The circle outline is what gives the ball its volume and makes it read as a 3D object.
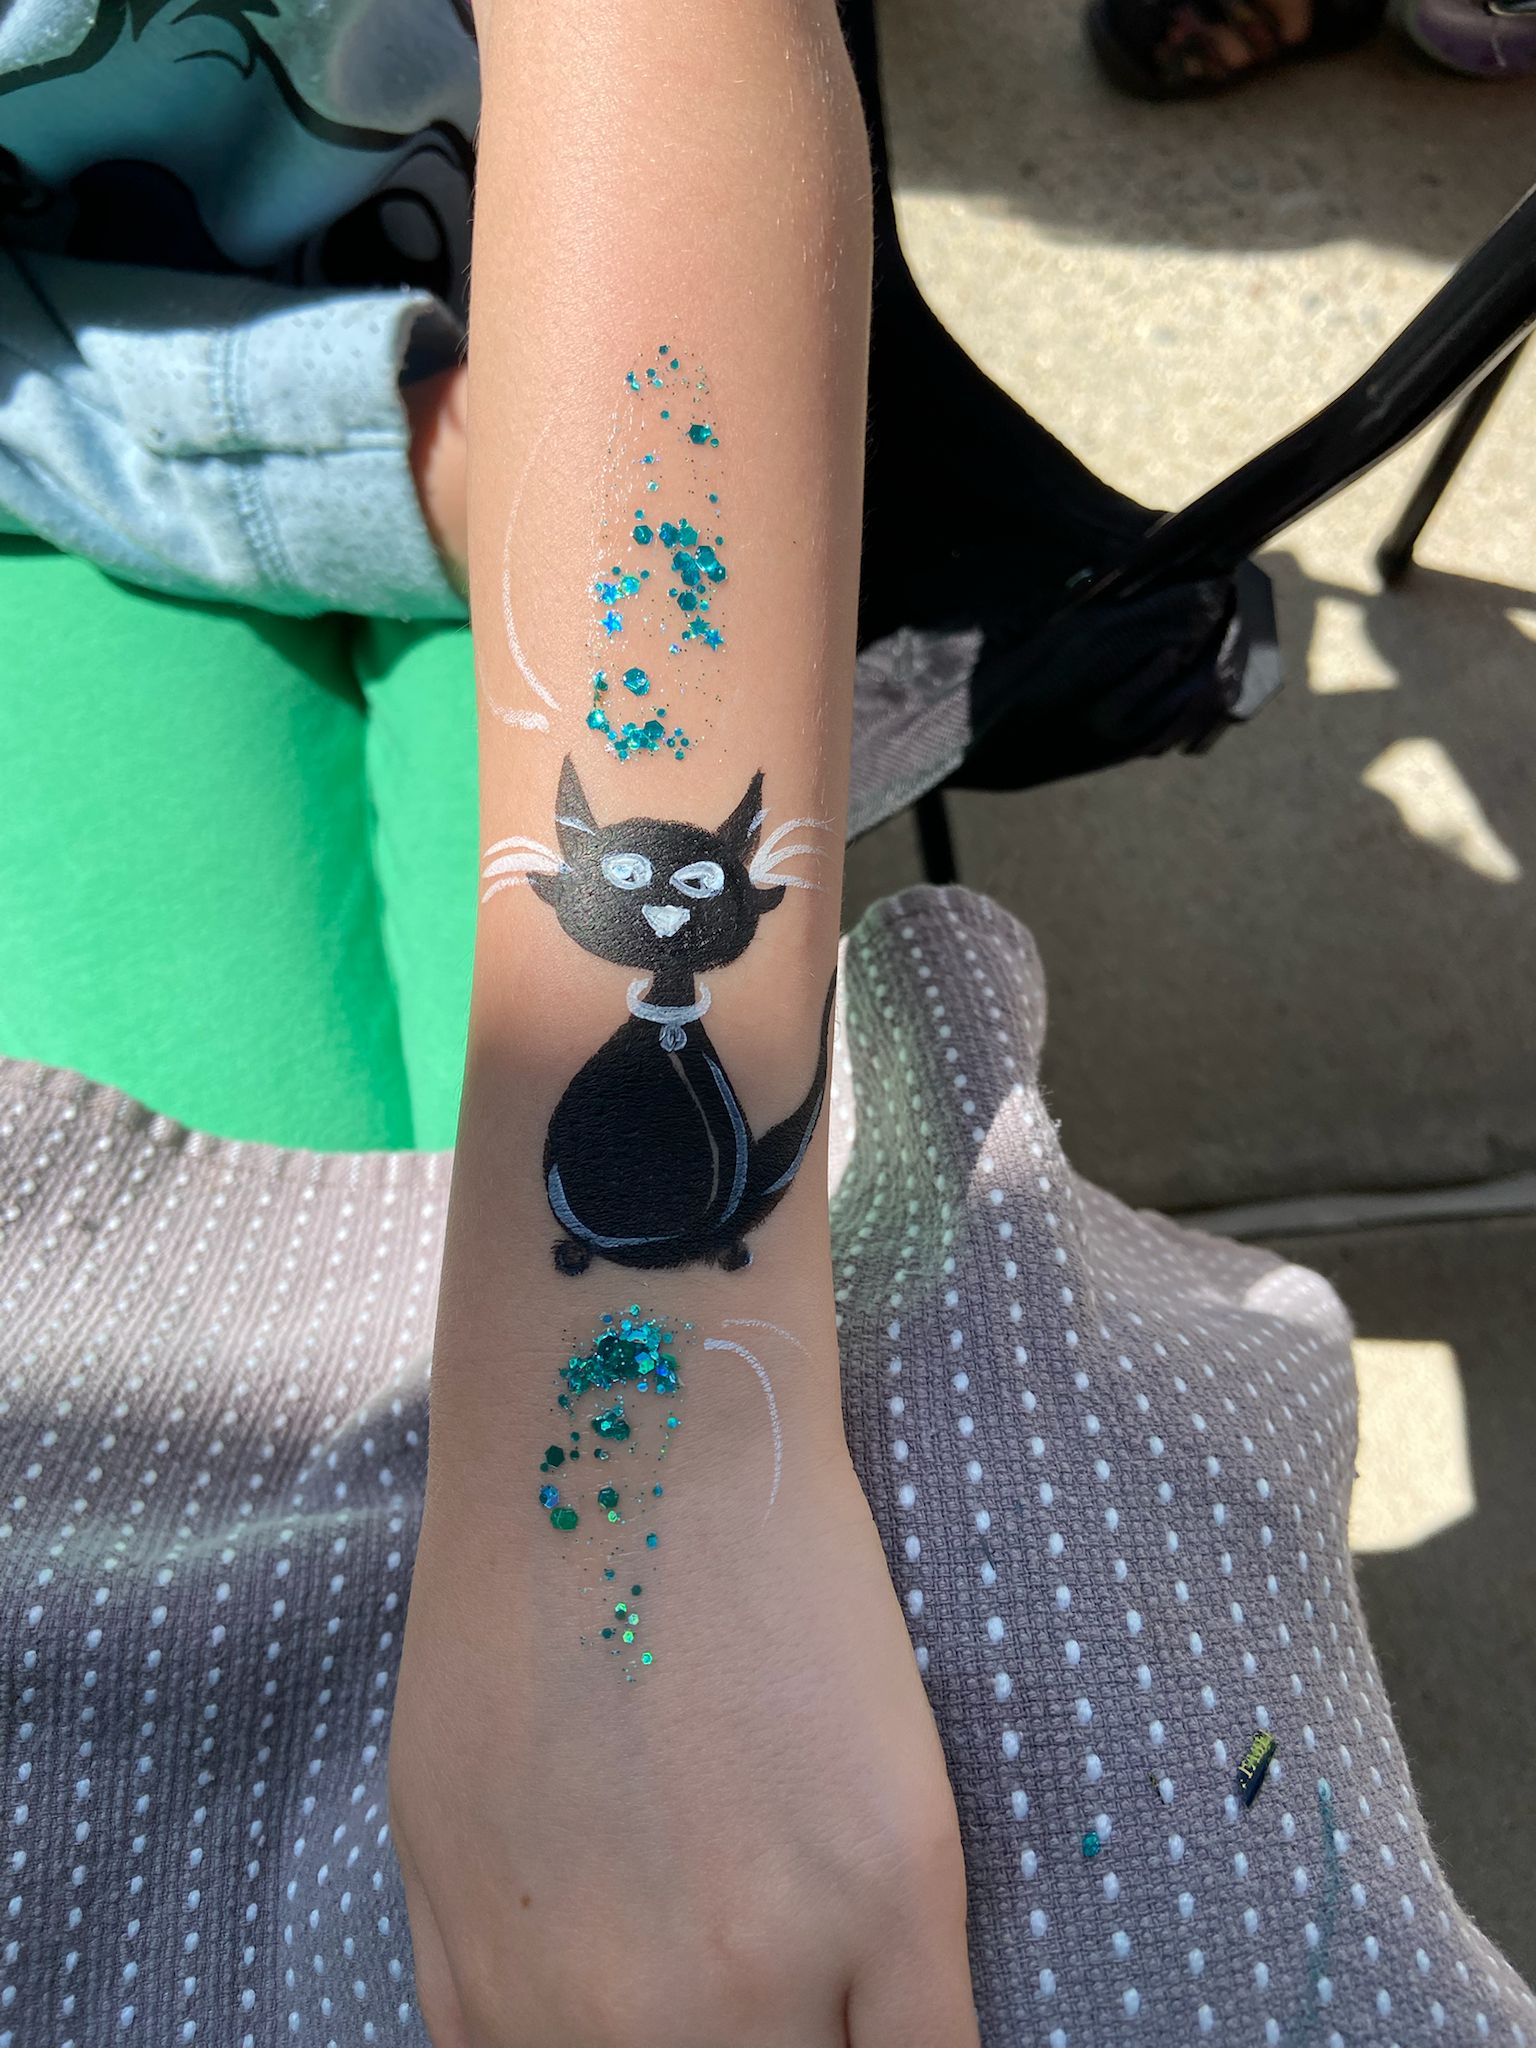
4. The Black Cat — Elegant, Fast, and Surprisingly Easy
This design breaks a common misconception: black cat face paint does not require a complex full-face transformation. Our version is painted on the arm or cheek as a silhouette sitting against a sponged yellow moon. Because it's a solid black silhouette, you never have to worry about painting realistic fur, individual whiskers on the face, or tricky facial proportions. All the complexity is an illusion.
Why kids love it
Cats are universally loved, and the black-on-yellow moon creates a striking, storybook quality that feels very special. At Halloween events especially, this design consistently gets the most compliments from parents.
Beginner tip
Paint the yellow moon first, let it set completely, then paint the black cat silhouette on top. If you paint black over wet yellow, you'll get a green-tinted cat. Wait the 30 seconds — it's worth it.
Common mistake
Painting the eyes too soon. Yellow eyes over wet black paint turn a muddy olive color. Always wait for the black base to dry before adding the bright eye details.
5. The Melting Popsicle — Summer's Best Party Trick
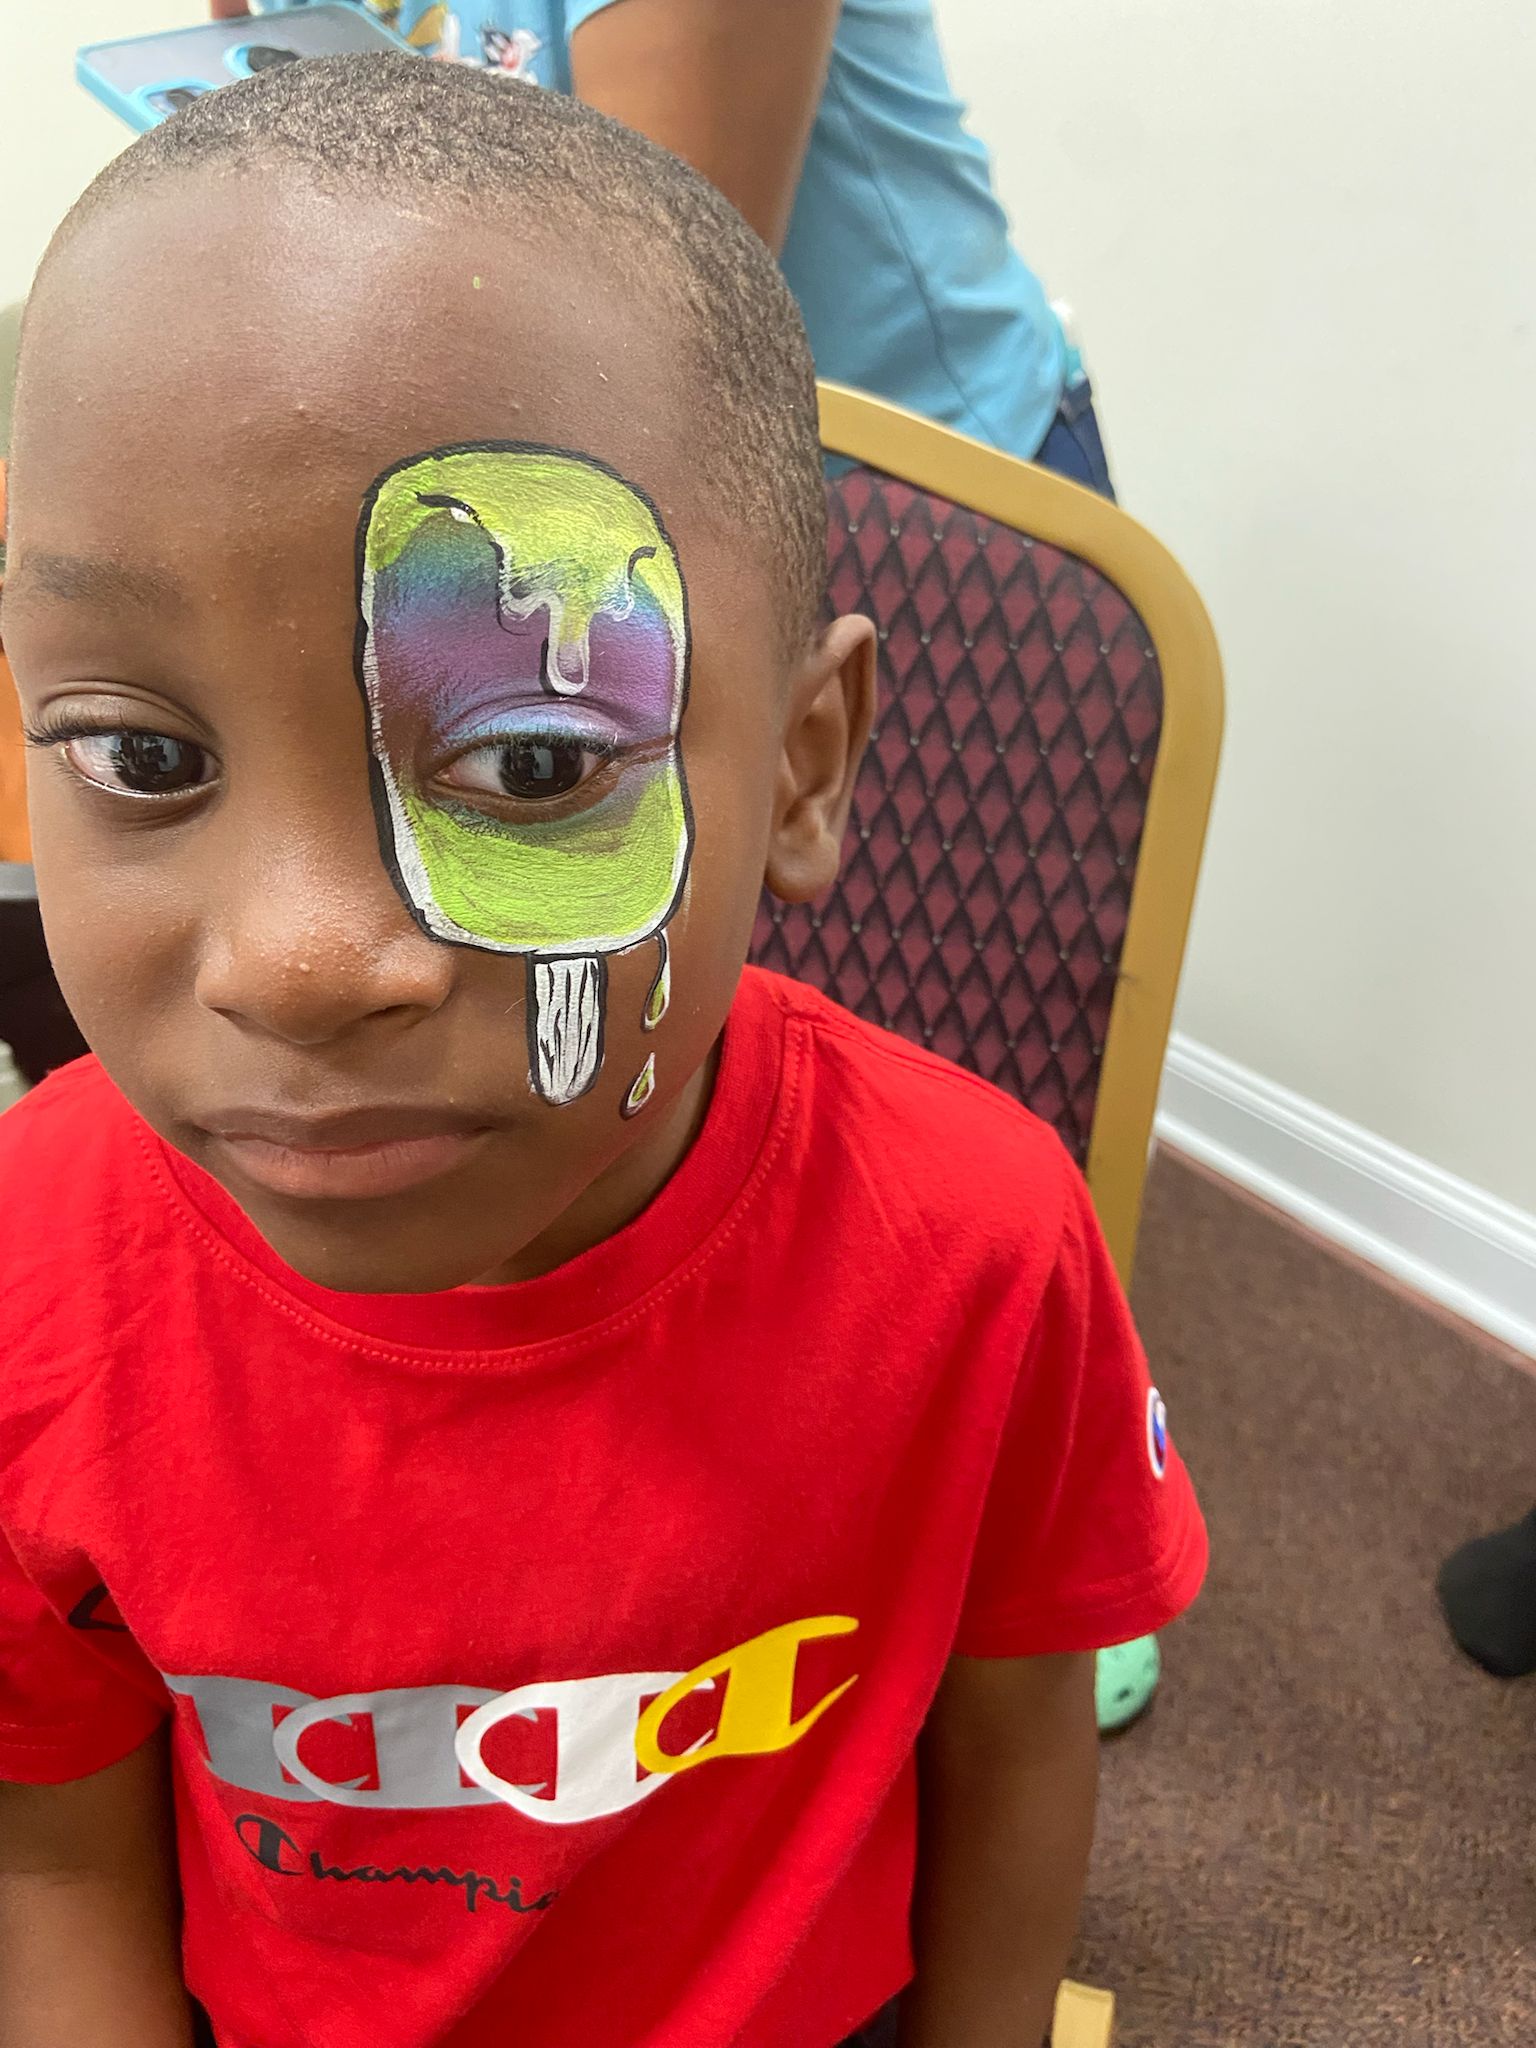
This design is perhaps the most delightfully absurd face paint you can create — and that's exactly why it works so well. A brightly colored popsicle, complete with wooden stick and melting drips, is painted right over the eye. The "melting" effect looks like the popsicle is dripping down the cheek, which creates a wonderfully comical visual. At summer events, pool parties, and food truck festivals, this design stops people in their tracks.
Why kids love it
It's unexpected and funny. Unlike most face paint designs that transform you into something, the popsicle feels like a wearable joke — and kids absolutely love being in on the joke.
Beginner tip
The drips are what make or break the design. Each drip should be a teardrop shape — rounded at the bottom, tapering where it connects to the popsicle. Straight vertical lines look like stripes. Teardrop shapes look like actual melting ice.
Common mistake
Forgetting the highlight. Two or three white highlight lines running down the popsicle body transform it from a flat painted rectangle to something that looks genuinely glossy and frozen. Don't skip this step — it takes 15 seconds and doubles the impact.
What You'll Need to Get Started
You don't need a professional kit to paint these designs. Here's an honest, minimal starter list — everything below costs less than $30 combined:
Professional Face Paints
A 6-color starter set is enough. Look for brands like Snazaroo or Superstar. Never use acrylic or craft paint on skin.
A Flat Brush
A 3/4-inch flat brush is the most versatile beginner tool. It handles base colors, rainbows, and most details.
Cosmetic Sponges
For applying base colors quickly and smoothly. A 10-pack from any beauty store works perfectly.
Small Water Container
A cup with 2 inches of clean water. Change the water every 15–20 minutes to keep colors clean.
A Hand Mirror
Let each child see the result. The reaction is the whole reward — for them and for you.
Baby Wipes
For quick cleanup, fixing mistakes, and removing designs at the end of the event.
Cosmetic Glitter (Optional)
Use glitter specifically labeled for cosmetic use, follow its directions, and keep it away from the eyes.
A Split Cake
Not essential but highly recommended. A rainbow split cake lets you paint multi-color designs in a single stroke.
Ready to Explore More?
These 5 designs are the perfect starting point. Once you're comfortable with the basics, you'll naturally want to try more challenging and creative designs. Here's where to go next:
Animal Designs
Tigers, butterflies, zebras and more. Browse the full animal collection.
Browse → 👸Princess & Unicorn
Magical designs for birthday parties and royal occasions.
Browse → 🎃Halloween Ideas
Spooky, safe designs for trick-or-treat and fall events.
Browse →See Real Results
Browse our gallery of real face paint designs from parties and events across North Carolina.
Learning Adventures
Pair face painting with free educational printables and worksheets kids can take home.
Frequently Asked Questions
What is the easiest face paint design for a beginner?
The rainbow is the easiest face paint design for an absolute beginner. It requires only a flat brush and a split cake, and can be completed in a single sweeping stroke. There are no symmetry requirements, no color mixing, and no complex shapes. The Donut Eye and Melting Popsicle are also highly forgiving because their "imperfect" look is part of their charm.
How long does face painting take?
Simple designs like the rainbow take 3–5 minutes. More detailed designs like the soccer ball or popsicle take 5–8 minutes. At a busy birthday party, plan for about 6 minutes per child as a conservative estimate. If you have 20 children, you will need approximately 2 hours to paint everyone.
Which face paint colors should I buy first?
Start with a set that includes: white, black, red, yellow, blue, and green. These six colors can be mixed to create almost any other color. A split cake with rainbow colors is also an excellent addition to cover multi-color designs quickly without needing to mix.
What age is suitable for face painting?
Professional face paints are generally safe for children aged 3 and up. For children under 3, avoid painting near the mouth or eyes. Always do a small patch test on the wrist if a child has sensitive skin or eczema. We recommend avoiding face painting for children under 18 months.
How do you remove face paint safely?
Professional water-activated face paints are designed to come off easily. Gently blot (do not scrub) with a damp warm cloth or baby wipe. The paint will lift in 2–3 wipes. For stubborn areas, apply a small amount of gentle baby wash and rinse with warm water. Never use acetone, alcohol, or nail polish remover on painted skin.
Can I use regular craft paint for face painting?
No. Craft paints, acrylic paints, and poster paints are not formulated for skin contact and can cause irritation, allergic reactions, and are very difficult to remove. Always use professional-grade, skin-safe face paint specifically designed for body art. The investment is small and the safety difference is significant.
From the Studio: Lessons Learned at Real Events
- The brightest colors photograph best. At parties, parents are always photographing their children. Designs in red, orange, gold, and bright white look stunning in photos. Pastel designs can look washed out in flash photography.
- Activate with water, not too much. Professional face paint needs water to activate. It should feel like soft butter on the brush — not watery. Too much water makes colors bleed; too little makes them crumbly.
- Use sponges for large areas. Sponges apply base colors far faster and more smoothly than brushes. For any design that covers a large area of skin, sponge first, then add detail with a brush.
- Don't rush outlines. If a design uses black outlines (soccer ball, popsicle, black cat), wait 30 seconds for base colors to dry first. Outlining over wet paint causes smearing that's very difficult to fix.
- Always have baby wipes. Mistakes happen. A single wipe can erase a mistake immediately. After 30 seconds, mistakes are much harder to fix. Keep wipes within reach at all times.